Showing posts with label felting. Show all posts

Monday, June 16, 2008

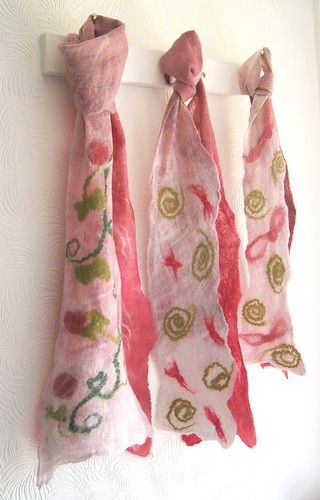
Three Scarves Fulled & the Six Foot Tall Lightbox

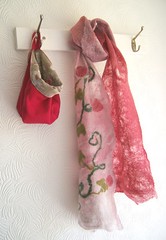
I love these two pictures. They were both taken in our porch which we hardly ever use (apart from storing junk in!).


The light in there is perfect, kind of like a 6 foot tall lightbox! Amazing... where oh where have I been to miss this one!

Just listed the wrap at the front and the scarf at the back in my Etsy shop. The middle one will be listed later on this week.


I'm just finishing off some felted pouches for Nintendo DS lite games, cameras etc.. and will hopefully be able to add them tomorrow.

Thanks everyone for your feedback on the felted scarf. It's really appreciated!

Read More...

Thursday, June 12, 2008

Felting: Wet felted WIPs

I just have time to share some of the current felting projects that are in the pipeline, (see, I really have been a busy little felter!)

Felt WIPs may/june 2008

1. Wet felted embedded square, 2. Nuno felt cushion panel, 3. Wet felting with resist, 4. Wet felted DS case, 5. Wet felted plush (penelope pig v.2), 6. Felted bookmark, mixed media,7. Wet felted runner or scarf, 8. Wet felted runner or scarf, 9. Wet felted runner & scarves, 10. Wet felted flower 2, 11. Wet felted flower 1, 12. Wet felted embedded square, 13. Wet Felted sheet, 14. Felt Bowl or Vessel no10, 15. Felt Bowl or Vessel no10

For a more detailed description of these items and the plans I have for each one, follow the link to my Flickr page by clicking on the photos, and check out the descriptions. Some of these items will be appearing in my Etsy shop in the coming weeks. So, if you like the look of something you can either let me know or just keep watching the shop. Thanks for all your support and encouragement!

PS: Have you seen the 3rd party Flickr Applications there are available now? This mosaic was created using the 'Mosaic Maker' over on bighugelabs.com. If you want to get more from your Flickr photos, then check out the servicespage on Flickr and follow the links.

Thanks for looking! x

Read More...

Sunday, July 22, 2007

Felting: Swirl Beads

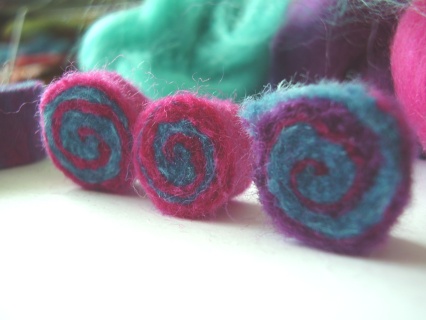
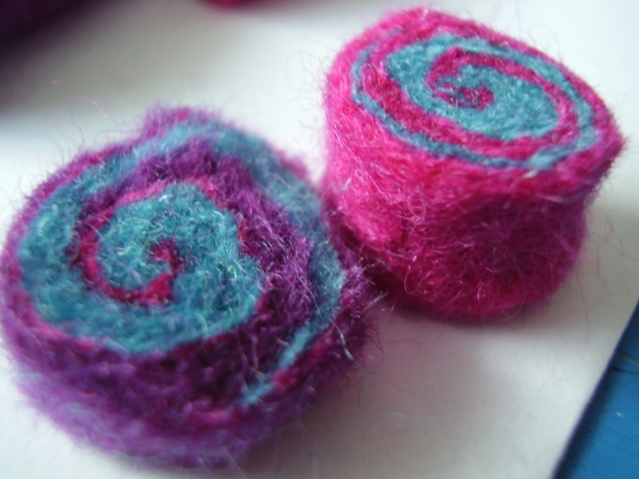
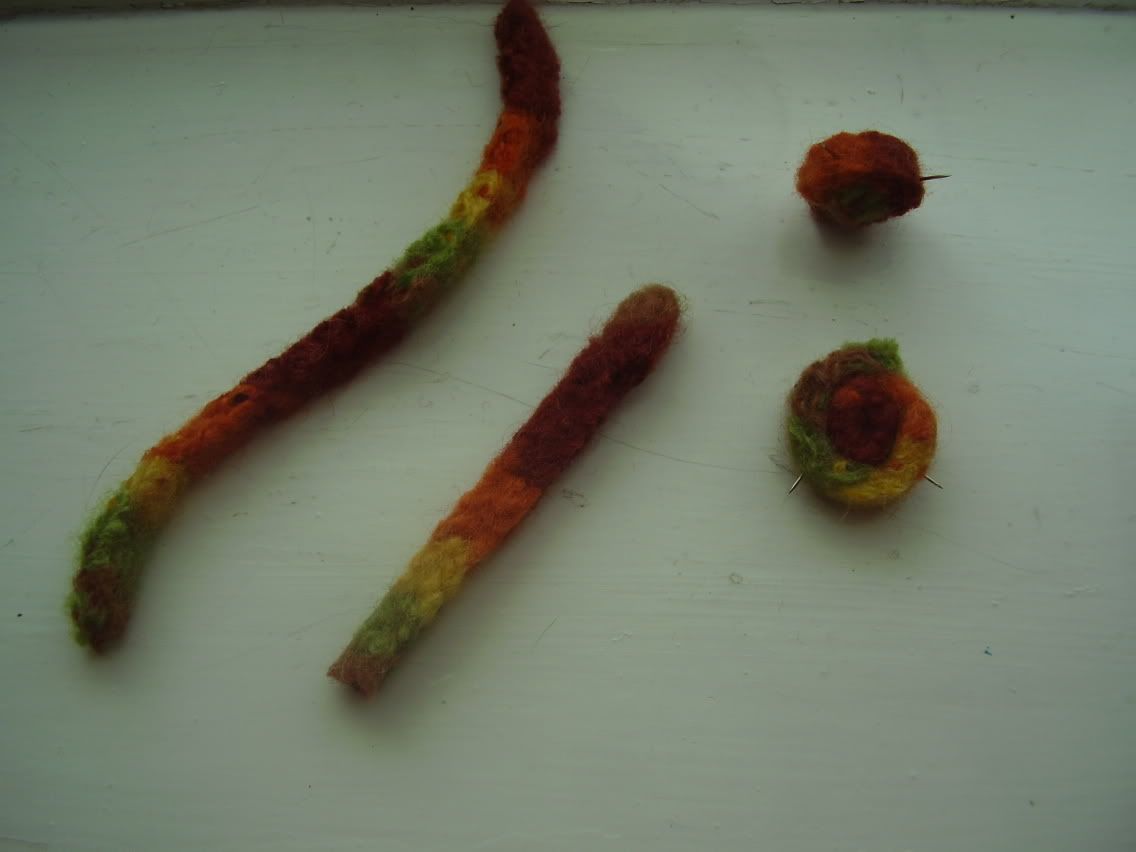
I made these swirly felted beads following a tutorial posted on the Felting Forum. I have also seen them made into 'sushi' beads somewhere over on Craftster. I think they'll be perfect for bracelets or accessories.

Katie had a play with them, and made this pretty picture - I'm going to call it "Sun shine and a tree".

Read More...

Coming Soon - Tutorial: Wet Felted Camera Pouch


The clue's in the title folks!

I'm in the process of typing up a tutorial for a felted pouch that I made.

It's big enough to hold my Nintendo DS or my Olympus Digital camera. Stay tuned!!!

Read More...

Tuesday, July 17, 2007

MFPD Felting Workshop

I'll be out this afternoon running a felting workshop with a group of about 15 adults from the Manx Foundation for the Physically Disabled (MFPD). It's part of a series of felting workshops that I am running this summer, two of which will be with the MFPD.

The first workshop is in Ramsey, not far from where I live.

The second workshop is at the MFPD headquarters in Douglas and will be with the 'SMILE' group (changed their name???).

I'll be posting about this later in the week.

Read More...

Monday, June 25, 2007

Felted Crochet Flower (Rose)

I've been trying to make my 'perfect' rose ever since I started crochet last year.

Every now and then I would pick up my hook and some wool and play, but never achieved anything satisfactory. In fact, I've got a bagful of 'roses' in the knitting box just waiting to become broches, be stitched together into a bag or even embellish a scarf.

But this latest effort, this little blue rose, has got to be my ultimate all time favourite.

I was not convinced that it would felt and shrink how I wanted it to but boy am I pleased. Check out the before and after photos - it has shrunk to about 1/4 of its original size. Now I just need to remember the pattern and write it down, so I can make more in lots of different colours.

None of the free flower patterns out there really grabbed my attention or fit the look I was after. And I guess I could have purchased a pattern, but I was determined to do it myself.

I know it's only a little slip of a thing, but it's another notch on my 'things I can do' list! Am I mad to make such a fuss over this? Maybe. Is it cool to create something from scratch? Definitely. With my hook or needles and some wool, I can conquer the world (or at least make it prettier!).

Read More...

Tuesday, June 19, 2007

Felted Soap: Number 2

Here's the 2nd felted soap that I finished off last night. I spent more time on this one and anchored some little bobble type spots on top of the felt with my felting needle then wet felted it again. I thought the bobbles would be pretty and practical - a kind of massaging effect when you use it.

Can you tell I'm spending waaaay too much time on this than I should at the moment. But I'm relaxed and having fun. BTW, I miss the digital camera and HATE the web cam. Every picture I take looks fuzzy! Harumph! >:(

Speaking of fun, I'm going to be visiting the the Manx Foundation for the Physically Disabled (MFPD) for two crafting sessions in July and August. As this is an easy activity I thought the gang might enjoy getting soapy and it will be enjoyable sharing my felting experiences with them from the past 12 months. I haven't seen any of the gang for over a year so it will be nice to catch up with old faces and meet new ones.

Plus it's something different to do which is always good. It's only a 2hr slot or thereabouts so there'll be no time for needle felting. It should still be interesting though. Good clean fun felting frolics!!

Read More...

Monday, June 18, 2007

Felted Soap

Back to the reason why I bought that wool roving a few weeks back. Felted Soap. What and why felted soap? Well, felted soap is like soap that is wrapped up in it's own little sponge or cloth. The soap lasts longer and when it does eventually get used up, you'll be left with a cute dainty little felted pouch which you could then recycle into something creative (or fill it with catnip and give it to the puss!)

BTW, check out Arleta's blog. She makes Soap Socks which are like little wooly sacks with soap in them. They are sent out unfelted and as you wash wash wash, the wool eventually shrinks around the soap. Fun!

We used Merino Wool rovings but I guess any felting wool will work. Also, save the nicest colours for the top layer - I wouldn't mind getting a bag of undyed unspun wool or roving to use as the base layers and then put the nice colours on top.

You can make it as decorative or plain as you fancy. Little Miss CB has said that she can't wait to wash her hands with this soap as it looks 'dead cool'. Even if it's just for the kids, it's worth a try. It's relatively inexpensive, and a nice clean activity. We felted a bar in the bath last night and Little Miss CB got clean in the process!!! Lol.

I believe, but haven't tried it yet, that you could add some grains (or whatever) etc.. if you fancy an exfoliating scrub.

There's a few different ways to do it but I read that it is recommended you use round or oval soap when starting as the corners on square or rectangle bars tend to poke through the felt. We bought a big multi pack of 'Simple Soap' from the supermarket and cut one bar in half, rounding off the edges and corners with a sharp knife.

Next we covered the bar with a length of wool roving, wrapping it around the bar in one direction (left to right) and then the opposite way (top to bottom). However many layers you use, make sure the fibres overlap.

Holding the wool wrapped soap in your hand, use your other hand to scoop up some warm-to-hot water and gently dribble it over the soap.**

Then drizzle on some dish soap and rub the soap in your hands; round and round and round and round and round......

** You can also make up a soapy water solution with warm water in the basin and have another basin or pot standing by with cold water in it. Today's effort was made using some shavings of olive soap soaked in hot water til it dissolved. But I guess you can use soap flakes???

Keep an eye on the soap edges and make sure you have covered them well at the start. Once the wool gets wet and sticks to itself it's impossible to cover the gap by 'pulling' the wool over it. You'll simply have to add more wool to the bar to cover any gaps.

Now you can be a bit rougher with the soap and roll or roatate it in your hands making sure you rub the entire surface.

Alternatively, you can rub your bar against a piece of bubblewrap to speed up the felting process. (no fancy equipment in our house!)

From time to time, squeeze the bar to remove any excess water and check how the wool is looking.

If the wool feels like a tight fit around the soap and isn't baggy, rinse gently in warm water and then dunk it into cold water to shock the fibres further. You can then just pat it dry with a towel or some kitchen paper and leave to dry on a cooling rack.

When the bar is dry you can needle felt a design onto it. I needle felted some wool scraps around the roving and wet felted them slightly. Although you've got to wait until the bar of soap is dry before needle felting or your needles will break!!! You've been warned!!!

PS, once again, apologies for the awful piccies. Web cam in operation, normal digital camera with The Man in Spain!

Read More...

Sunday, June 17, 2007

Needle Felting (not another craft Bernie?)

Yes, Needle Felting. Yes, another craft. Or at least, more of a dabble really. Do you find that crafts overlap in more ways than one? I would never have considered this 12 months ago but it has got to be the most fun and relaxing craft that I have done to date (well, apart from knitting of course) ---:). Plus it is very affordable to do (the two needles, handle and foam pad set me back less than a fiver including postage!).

I mean, what else are you supposed to do with your leftover wool roving, the best part of which you shared with your lovely little daughter, except to perhaps Needle Felt. Actually, Spinning would probably be my first choice but A) I don't have a spindle, and B) if I did i wouldn't know what to do with it.

I digress. Back to the needle felting. I'm working on something super top secret and hush hush at the moment and....... Oh, speaking of which, do you ever find that when you read this on a crafter's blog it usually means they have a book in the pipeline or they are going to be published with a popular e-zine? Yes? No? Well, that's not the case here (had you going there for a minute though didn't I). Stick with me and check out these piccies of my first real needle felting project.

This is the result of a morning and afternoon spent playing with the left overs from yesterday's felting fun. I've also incorporated other fibres with the wool roving and my yarn scraps bag came in very handy for this when I needed just a bit of 'green' or a little bit of 'pink', a smidgen of blue, etc.. (You get the idea).

I can't say much more about this project except it was fun and it really is part of a gift for someone special. Yet another swap pal I hear you say? Well, actually, yes but I've gone of on a slight tangeant with this project and have tackled it in a rather unorthodox way but all will be revealed in a couple of weeks.

BTW, did you know that felting needles have these little 'barbs' on the shaft? No? Neither did I until I ordered a couple on the internet the other day. And all I could think was what the hell am I doing with these lethal weapons. Obviously it's not as intimidating as the instructions but it does pack a prick or two when you accidentally but rather enthusiastically poke yourself in the finger once or thrice!

PS poor quality images due to webcam as digital camera is with him-from-indoors in Spain this week. Harumph! :(

Read More...
Saturday, June 16, 2007

Wet Felting with Merino Wool Rovings

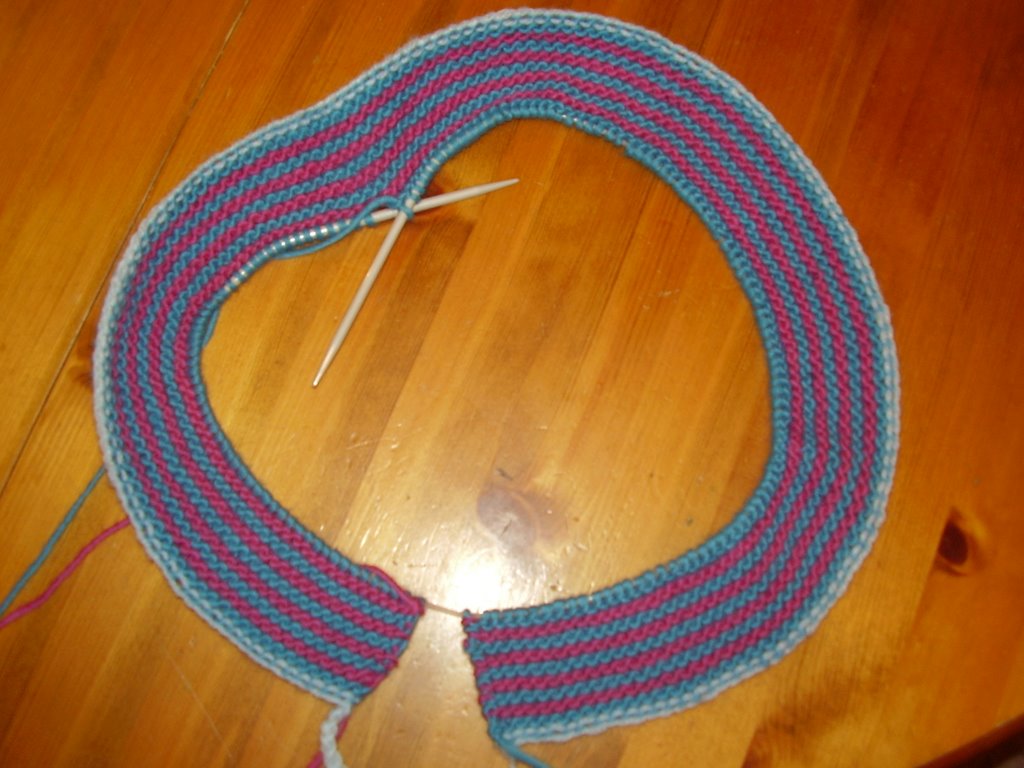
We've had a fun and interesting couple of hours today. We experimented with Wet Felting.

Initially it was just me and Little Miss CB. She needed a little encouragement as to her, crafting is the devil's work.

Anyway, once she got her hands on the wool she began to enjoy herself, and successfully made two pieces of felt. The top one is the first effort and I think she did a really great job.

We were then joined by one of her friends who wanted a go and they both made a stripey piece each. I gave them each a plastic tray so they could take their felt to the sink easily enough and still work at the table. But by the time time she began to felt the 2nd piece of wool, she really had had enough and started to show off. Regardless of her behaviour though, the girls had fun and were very pleased with the outcome.

Now it's a question of making a small little something with their piece of fabric - maybe a little coin purse or a pencil case or a bookmark perhaps!!??!! That's something for another day.

Anywho, time to put me feet up for a bit. I think I'll just have a valium sandwich to help me settle down though! :) Lol.

Read More...
Tuesday, June 05, 2007

Woolly Stash Enhancement: (just a lickle one, honest!)

I'm flashing my stash as I get ready for a period of serious felting!

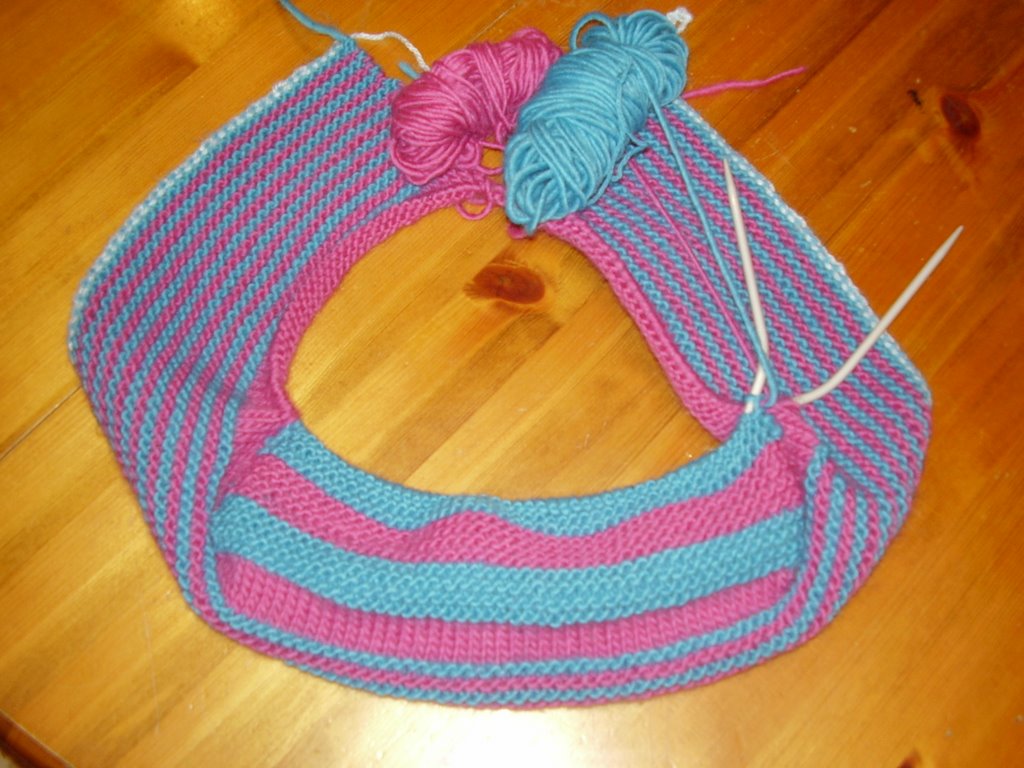
I've been on the hunt for wool this past few weeks and have finally managed to replenish my stock. Look at this pretty little haul that I scored off e-bay:


Can you guess what the grey wool is? Of course you can. It's written in HUGE letters on the front. It's Lopi wool, something I've been dying to try for the longest time. That should make a nice felted bag or two.

Next I managed to score some Twilleys Freedom Spirit for a 1/3 of the price which I am very happy about, naturally! I hear this felts up well, too well in fact, so I'll have to watch what I use this for.

And finally, in the bottom of the picture is two packets of merino wool roving in a red/honey mix and a blue/grey mix. This is intended to be used for some easy felting projects with Little Miss CB & her friends (like beads and whatnot) but also to make some felted soaps.

That's it for now. I'm not buying any more wool until I catch up on my FO's and WIPs.

I'll report back at the end of the week on our felting progress, if we haven't killed eachother by then. One more week of TT and they're back at school. Yay!

Oh, and ps: I forgot to mention the two lovely skeins of Cascade 220 which Kathryn sent me in exchange for the red/green needle roll. Thank you Kathryn!

Read More...

Tuesday, September 26, 2006

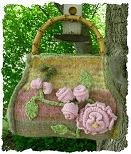
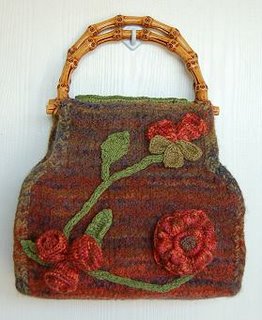
English Garden Bag: Back on the Menu!

Yay. The English Garden Bag is back on the menu!

Remember, I found it in July, fell in love, bought some wool, got disheartened with my choice, frogged my work and promptly dumped this one on the 'to do' pile. Well the challenge for the October Bag KAL has been set. We will be working on the English Garden Bag by Crystal Palace Yarns.

The bag is made with two strands of yarn held together: CPY Taos (which is a striated yarn) and CPY Aran in contrasting colours. Now, the only real problem I have is that I couldn't find the recommended yarn for the project. So I will be improvising. And as it is 3 months since I last considered this project, I'm confident (ish) that I can figure out a decent colour combo.

I really like the reddish tones in the new version of this bag (to the left) so I will probably work along these lines. However until the yarn is in the bag, so to speak, anything can happen.

PS Crystal Palace Yarns has a blog now. The moderator is Angela and she is very helpful. Especially if you have any questions re their projects or yarn. Enjoy!

Read More...

Wednesday, September 20, 2006

September Bag KAL: Finished!

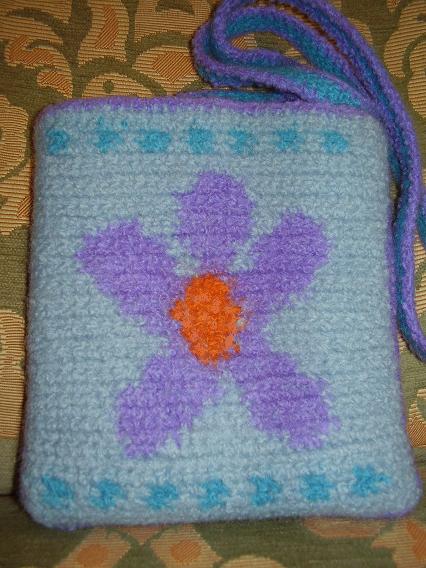
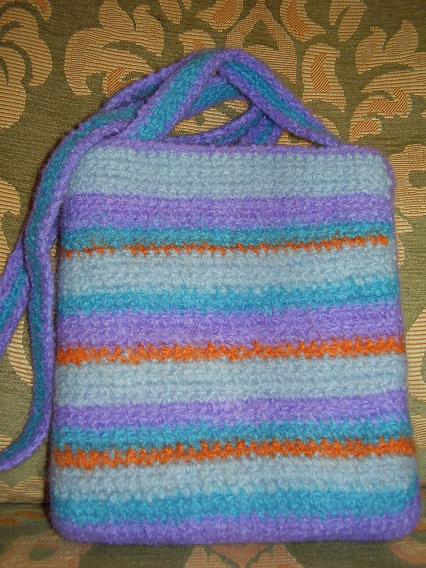
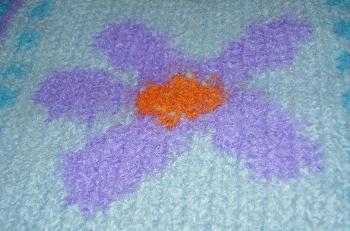
Here are some pictures of the finished crochet bag from the September Bag KAL. Although the challenge was to knit a bag with some colourwork and felt it, I decided to crochet mine using 'Tapestry Crochet'. As I've mentioned a lot lately, this is a technique I learned from Debbie Stoller's SnB Happy Hooker book.

The bag is simply two crochet squares with a basic flower chart worked in.

I really enjoyed the colour work and wouldn't mind doing more again in either a knitting or a crochet project! It did take me a long time to chart out properly but once that side was done, the rest was easy.

I was surprised how differently the crochet bag felted compared to the knit bags I have made. It seemed to lose more width than height, which I have found is the norm when I felt my knit bags. Must be something to do with the way the stitches are constructed. The bag started out as 9.5 square and lost about 2" from the height and 3" from the width. The strap was 59" before felting and 50" after.

I didn't have anybody in mind when making the bag but I made it in Miss CB's favourite colours in case she fancied it when it was finished. And she likes it. She was all 'oooh' and 'wow' when she saw the flower pattern appear.

The strap is long enough for her to carry the bag across her body, keeping her hands free for the things that 9 year old girls need to do. Hope you all like it.

Enjoy! X Bernie X

Read More...

Sunday, August 13, 2006

Royal Manx Agricultural Show: Gallery

I've set up a small gallery on Flickr.com with photos from the show yesterday. There are only a few photos in the gallery so it won't take long to go through them. You can either click on the flickr badge in the sidebar or click here.

It was a great experience entering the show and I'm sure we'll be entering again next year. However I'll make sure we have plenty of time to enjoy all the demonstrations and displays next time.
Lace Making
We saw the following demonstrations: felt making, spinning, tatting and lacemaking. One of the lace exhibitors had her very young grandchild on her lap (probably about a 18 months old) and she was moving the lace bobbins around while her grandma counted. It was really sweet. Catch them young, that's what I always say!

Rainbows, fairies & butterfliesThe chairperson of the embroidery guild was making felt in the exhibition tent and it was great to see. I meant to get a photo but somebody muscled in. I've never seen felting in the flesh before. Only in magazines or books. The chairperson was very chatty and kindly explained the process.

We popped into the the Women's Institute (WI) tent to look at their displays. Each year they choose a theme and this year it was 'Rainbows, butterflies and fairies'. I only liked this display. The others weren't my cup of tea.

In addition to the displays in the WI tent, there was a lady spinning on a modern wheel, rather effortlessly I might add. I didn't appreciate that the quality of the wool wool varied from the sheep's shoulders down to the legs. You learn something new every day!

My FIL's partner entered the produce section and won first prize for her profiteroles and scones. In addition, she won 2nd prize for her plated apple tart.

So, it was a good day out all around.

Here is a picture of all the items that we entered into the Arts & Crafts classes:

Crochet Amigurumi Chick & Crochet Bag Drawing of fruit bowl and felt pin cushion Felted bags, Knit bag & Amigurumi Amineko Liesel scarf & Lengthways scarf

Read More...

Saturday, August 12, 2006

Royal Manx Agricultural Show: Judging Over....

I created. I entered. I kicked some booty!

Yes, what you see before your very eyes are the winning exhibits in the knitting & felting classes. More details about the Agricultural Show to follow soon but for now, I won:

- FIRST prize in the 'coarse yarn' knitting class for my lengthways knitted scarf (NOT the Liesel, funny story that.... later);

- FIRST prize in the 'felting' class for my turquoise 'B4 bag';

- SECOND prize in the 'felting' class for my red 'Romantic Ruffles' bag.

How can one top that, I hear you say. Well I'll tell ya. I received the Reserve Silver Cup ROSETTE for the best exhibit in the Open Classes in the Arts & Crafts Section for my lengthways knitted scarf.

How cool is that!!!

Little Miss CB didn't do too badly either. She who doesn't normally enter raffles or competitions, was delighted when she discovered she had won:

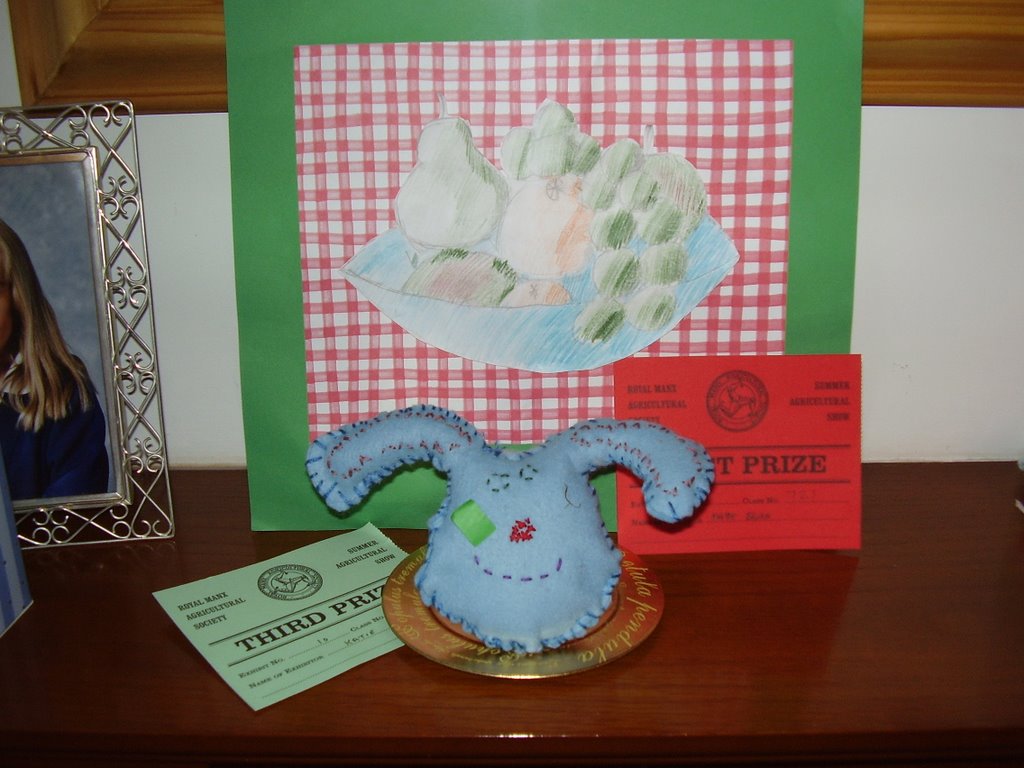
- FIRST prize in the 'drawing - colour work' class for her age for her picture of a bowl of fruit;

- THIRD prize in the 'needlework' class for 11yrs and under for her felt bunny pin cushion.

Didn't she do well!

That's all for now. I'll try to post a more detailed update in the coming days. So much to share, so little time and so very VERY tired. Yawn.

Thank you all for your kind wishes and luck.

Related topic: agricultural show update.

Read More...

Thursday, July 20, 2006

Felting notes: how to do it!

I thought it would be useful to share this with you fellow felters out there. There are loads of links on Blogger and Google for felting so don't be afraid to search. But here are my notes about my first felting project:

  • I like to felt my bags in the washing machine.

  • Make sure you put the bag into a pillow case and secure it closed with a hair band or elastic band (we don't want any lint or fluff clogging up the machine).

  • Throw some towels and old jeans into the washing machine to aid the agitation.

  • On my washing machine I am able to reduce the amount of water used in a wash by pressing 'mini load'. If you have a similar function I would suggest using that. Try to keep the water to a minimum.

  • I am also able to stop my machine by cancelling the wash programme. This allows me to remove the bag and check it when I need to (every 10 minutes approx?) to see how it's progressing. It's wet work but worth it in the end. If I think it needs more time in the machine I simply restart the programme.

  • Take this opportunity to stretch and pull the bag into shape. I'm a bit more cavalier and have been known to just shove a bag into the machine and leave it on for a full cycle - gasp - without stopping it once!

  • Wash it on a hot cycle! Depending on the wool you're using you could get away with washing it on a 40 degree cycle but I would try 60 degrees to be on the safe side.
  • Some felters recommend that you don't allow the washing machine to go to a spin cycle as this can crease the felt but I don't bother with this rule.

  • You can also use a tumble dryer to get the bag to shrink more if you find it's not getting any smaller in the washing machine. (The owner of our LYS uses King Cole Merino superwash wool to felt with and she says that her tumble dryer actually shrinks the superwash wool. Amazing! I thought superwash wool was unshrinkable!?!)

  • Once I have blocked my felted bags, I like to put them on the top shelf of our airing cupboard/hot press to dry. My B4 Bag dried out within 24 hours.

  • My first felting project was the Swatch & Block pattern from Magknits. If you have any wool left over, I would suggest making the coin purse (Swatch). It's a nice little project and it leads nicely into the bag (Block) as it uses the same techniques.

    I felted my first bag by hand and that was more than enough - this link will take you to the 'experience': http://craftybernie.blogspot.com/2006/05/felted-square-bag-update.html

    I hope you find this information helpful. It's not an exhaustive list but it's a start.

    Best wishes...bernie

    Read More...

    Friday, July 07, 2006

    Felted Bag - English Garden by Crystal Palace Yarns

    OMG! Have you seen this felted bag?

    .... sorry, just picked myself up off the floor.

    I love this bag. I've got to have this bag. I'm going to make this bag. I love bags!

    Here's the link.

    Read More...

    Thursday, June 29, 2006

    Natural Dye Studio - Self Explanatory!

    Here's the mail I sent to Natural Dye studio yesterday:

    I purchased 2 skeins of hand dyed wool/mohair DK Clementine on 23 May 2006. The Item No is 8285887406. I would like to report that although the bag felted beautifully (and the mohair creates a nice loopy texture) I am very unhappy with the colour. It's a nice colour but it doesn't exactly go with my project - a summery yellow/orange mix!

    I can't find anything on your site which says not to felt with this wool as it will cause EXTREME colour changes. Perhaps this is something you need to mention on your site. I would also like to add that I am not the only customer who has had this experience/surprise.

    There is a pic of the bag here for you to see how the wool turned purple/pink. I am not asking for any compensation or any replacement product but I think it's worth pointing out that the Natural Dyes will react to felting!

    Many thanks.Bernadette Bevan

    And the Reply:

    Hi Bernadette

    Thanks for your mail.
    I am sorry you are disappointed.
    I have only recently begun to felt my wool and discovered that the colours sometimes change.
    I think this is due to the chemicals in washing powders, I use fairy snow in my washing machine, but suspect other powders have a similar affect.
    I have got a section of felting wool in my ebay shop and have included photos of felted swatches in all the listings so our customers can see the changes before they buy.
    I will be adding a FAQ page to my website and ebay shop which will have the colour change information on it.
    I hope this helps.

    Best wishes
    Amanda

    Read More...

    Wednesday, May 31, 2006

    Felt buttons/beads from scraps

    I made these little buttons for my bright multi stripe bag from the waste I trimmed off the edge of the flap (when the bag felted the flap's edges were curling up).

    I cut the strips into 3" lengths and rolled them into little felted beads. I think they will look pretty cool when I embellish my bag with them.

    See, never throw anything away, at least not unless you've had a good play with it and can't find any possible good use for it, at all, whatsoever! :)

    Read More...

    Monday, May 01, 2006

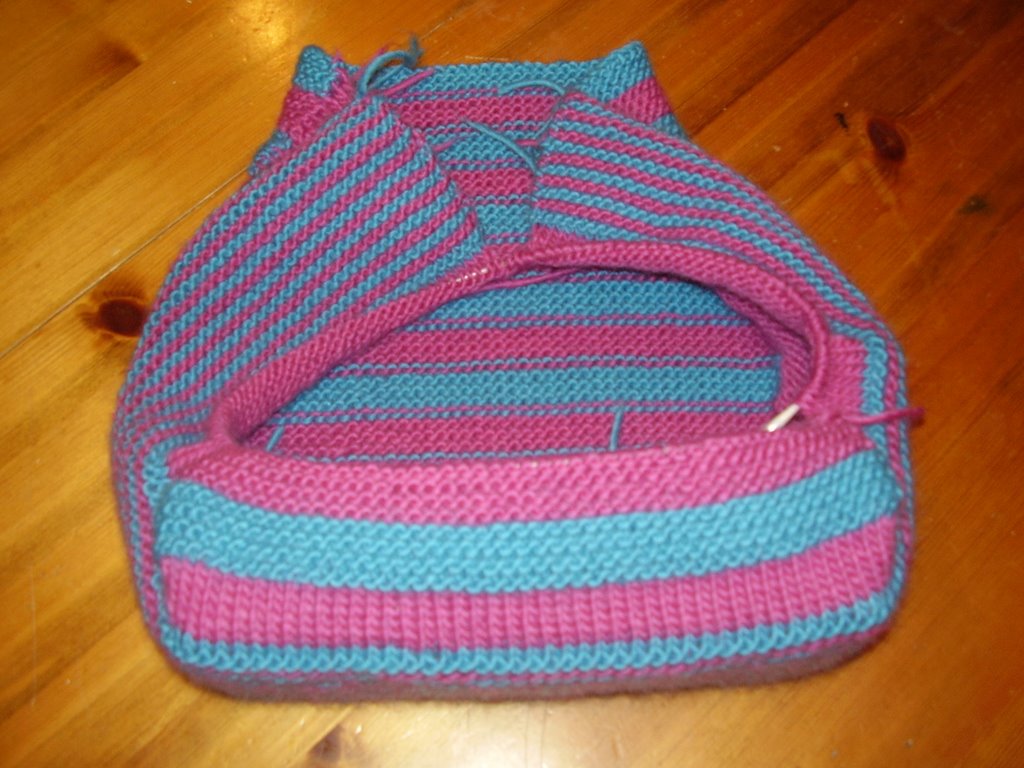
    Felted Square Bag

    This is a pattern I found on Magknits and it is for a bag called Swatch & Block

    Cast On
    With spare wool, I created a crochet chain and used this for a provisional cast on.

    Bottom & Sides
    Using circular needles, I knit back and forwards to create a long panel which will become the base and sides.

    Knit Front Panel
    Having picked up the middle 50 stitches, I knit each row, slipping last stitch onto needle and knitting into one stitch on side piece, pass over the slipped stitch.

    Front Panel is Complete
    In this picture you can see the front panel (bold stripes) has been knitted until there were no more stitches on the side pieces to pick up.

    Begin Back Panel
    The back panel is worked in the same way as the front panel. All that will remain when main bag is complete is to knit the strap. Then (fanfare) to felt it!

    Further details to follow....

    Thanks for reading.

    Read More...